-->
Showing posts with label Blogger. Show all posts

Method to Enable Right Click On Websites

You probably may have come across some websites that doesn’t allow you to copy any content from there websites by blocking right click.When you press right click on these websites either you will get a prompt with some message or nothing will happen.Sometimes this is very annoying as you may need that content for your college project or some other urgent purpose.There are several workarounds to bypass this.
Trick on How To Enable Right Click on WebsitesI will tell you the best and the most simple trick.You don’t require any software or addon for this trick.Website that block the right click do it using a javascript code.If you block javascript code in your browser then your right click cannot be blocked. Here is the tutorial on How To Enable Right Click on Websites
If you are Using Internet Explorer Browser
  1. Goto Tools>Internet options>Security
  2. Now Click on Custom Level
  3. Now find Scripting Section it will be around the end.
  4. Now disable Active Scripting.This will disable JavaScript and vbscript in your browser.
  5. Click on OK.
  6. Now restart your browser
If you are Using Mozilla Firefox Browser
  1. Goto Tools>Options>Content
  2. Uncheck the box Enable JavaScript
  3. Click Ok
  4. Open the website that have blocked your right click.
If you are Using Google Chrome Browser
  1. Click on the Wrench Icon on the top right side on your browser.
  2. Click on Options
  3. Now goto Under the Hood tab
  4. Click on Content Setings and then on JavaScript
  5. Disable java script and open the website.
There are a lot of other tricks to bypass blocked right click.I have discussed the most basic trick that you can use anywhere without any special software.If you also want to share your trick then do comment.
Read more >>

Create a Tabbed Content Widget for Blogger!

Tabbed content box or tab view is a great way to maximize the usage of precious screen real estate on your blog.
There are quite a few tutorials out there that show how to create tabs with CSS and jQuery. However, most of them require you to modify your blog template codes. On top of that you also have to manually add the content of each tab.
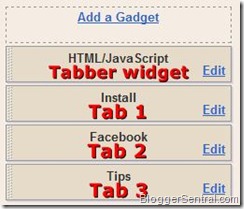
Fortunately, with this tutorial you don’t have to go to all that troubles. All you have to do is add our tabber code into a HTML/Javascript widget. Once added, it will transform your Blogger blog’s existing widgets into tabs, automatically!
See the demo here.
Below are some of the features of the tab content box:
  1. Accommodates unlimited number of widgets.
  2. Keeps the tabbed widgets’ original appearance.
  3. Fully widgetized for ease of installation and removal. If you don’t like what it does, simply remove the HTML/Javascript gadget.  

Installation

  1. Go to Design > Page Elements and click Add A Gadget.
  2. Select HTML/Javascript widget.
  3. Leave the title box blank.
  4. Copy the code below and paste it inside the content box. 
<style type="text/css">
.tabber {
 padding: 0px !important;
 border: 0 solid #bbb;
}
.tabber h2 {
 float: left;
 margin: 0 1px 0 0;
 font-size: 12px;
 padding: 3px 5px;
 border: 1px solid #bbb;
 margin-bottom: -1px; /*--Pull tab down 1px--*/
 overflow: hidden;
 position: relative;
 background: #e0e0e0;
 cursor:pointer;
 -moz-border-radius:5px 5px 0 0;
 border-radius:5px 5px 0 0;
}
html .tabber h2.active {
 background: #fff;
 border-bottom: 1px solid #fff; /*--"Connect" active tab to its content--*/
}
.tabber .widget-content {
 border: 1px solid #bbb;
 padding: 10px;
 background: #fff;
 clear:both;
 margin:0;
}
.codewidget, #codeholder {
 display:none;
}
</style>

<script type="text/javascript" src="http://ajax.googleapis.com/ajax/libs/jquery/1.6.0/jquery.min.js"></script>
<script type="text/javascript" src="http://greenlava-code.googlecode.com/svn/trunk/publicscripts/bloggertabs0.1_min.js"></script>
<script type="text/javascript">
$(document).ready(function() {
 $('#codeholder').bloggerTabber ({
  tabCount : 3
 });
});
</script>
<div id='codeholder'><p>Get this <a href="http://www.bloggersentral.com/2011/05/create-tabbed-content-blogger-widgets.html" target="_blank">widget</a></p></div> 
  1. Position the HTML/Javascript gadget above the gadgets that you want to tabify.
     tabbed contents view elements
  2. Click Save and view your blog.


Post-installation

  • Make sure you title each widget that you want to tabify. Tabber won’t work properly without widget titles.
  • Reduce tab widths so that all tabs fit into a single row. This can be achieved by using short widget titles.
  • You may need to reduce the widths of the tabified widgets to fit them into the box.
  • Don’t forget to test in Internet Explorer. This widget may cause “Operation aborted” error in IE for some non-designer templates. If that’s the case, this widget is not for you :(

Courtesy : BloggerCentral
Read more >>

Automated Blogger Summary!

Wordpress users may have the power to display automatic post summaries for their blog posts. But what can the blogger users do? Should they continue using the "Jump break" button each time on their posts? Are the Blogger users all doomed? Do only Wordpress users have much power? Of course not! Now here's a way with which you can create automatic post summaries of equal characters for your blogger blog post. Actually I must that this one is really amazing. It will automatically create post summaries with thumbnails too.


You need not add any extra code to your posts to enable this trick. It works on its own. You just gotta make some changes to your blog template. These post summaries will be displayed on all the pages except the post page. Now let us proceed to add this to your blog.

ADDING THE CODES TO YOUR TEMPLATE

  • Go to blogger.com and log into your account
  • Navigate to DESIGN > EDIT HTML
  • Download a copy of your template before making changes.
  • Find the </head> tag ( Use CTRL + F for fast search )
  • Now replace the </head> tag with the codes below.
<script type='text/javascript'> 
var thumbnail_mode = &quot;float&quot; ; 
summary_noimg = 230
summary_img = 140
img_thumb_height = 100
img_thumb_width = 100
</script> 
<script src='http://blogergadgets.googlecode.com/files/excerpt.js' type='text/javascript'/> 
</head>

  • You can edit the parameters in blue color
  • Now find the <data:post.body/> tag
  • Replace it with the code below.
<b:if cond='data:blog.pageType == &quot;item&quot;'> 
<data:post.body/> 
<b:else/> 
<b:if cond='data:blog.pageType == &quot;static_page&quot;'> 
<data:post.body/> 
<b:else/> 
<div expr:id='&quot;summary&quot; + data:post.id'> 
<data:post.body/> 
</div> 
<script type='text/javascript'> 
createSummaryAndThumb(&quot;summary<data:post.id/>&quot;); 
</script> 
<div style='clear: both;'/> 
<span style='padding-top:5px;;float:right;text-align:right;'><a expr:href='data:post.url' rel='bookmark'><b>Read more >></b></a></span> 
</b:if> 
</b:if> 

  • Save the template.
That's it now, you can see automated post summaries in homepage and also in the labels page but not in the post page. 

Hope you liked this post and don't forget to share this with your blogger friends!

Courtesy : Webbuzz
Read more >>

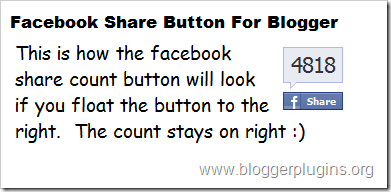
Adding Facebook 'Share Count' Button

Facebook has 5 styles of Sharing buttons. Here we will see two of them.
Adding a Facebook share count button will show a neat count of how many times your blog post has been shared on Facebook.

Facebook Share Button Style 1

facebook-share-button-for-blogger-1
Read more >>

Alexa Ranking

I have been hearing about the alexa ranking from my friends and relatives for a pretty long. They told me that when this ranking decreases, your site's reputation increases. I have been searching for how to get a good rank until today, when I suddenly read came across a post by my friend Ganesh Babu on www.axleration.com ! He has written a wonderful article. Rather than copying that, I guess, it would be better to give a link.. Here it is :
 http://www.axleration.com/10-tips-to-increase-your-alexa-rank/


Read more >>

Sending updates about your site to your Blog Readers!

This is a great method to reach your readers through mobile. Now, your readers get alerted via sms when you post a new post on your site. This was made possible with the help of Google's SMS Channel! You can just put a post in your Channel and all your readers get a SMS informing them of anything you have posted!

To start using the SMS Channel, do the following:

  • Go to Google SMS channel and login with your Google account.
  • If you are creating/subscribing a SMS channel for the first time, then you will be asked to set a nickname for you and enter your mobile number for verification. ( For assistance see the pic below )


Read more >>

Recovering a deleted Blog on Blogspot!

We have been doing a lot of mistakes since childhood. Sometimes coz we were insane and sometimes when we are bound by emotions. And one such mistakes can be deleting your BLOG!! What a big mistake!
Well, there is a method to recover back your blog in Blogger. Not really complicated and all..
Lets start..
1. Go to your Dash Board in Blogger.
Click to Enlarge!
2. Click on 'Undelete this blog' link near the blog name.


3.  Thats it.. This step is to Enjoy ;)
Read more >>

Live chat with your visitors | A tool by Google!

This tool is invented by Google and is named 'Google chatback'. This service allows your customers to chat with you directly when you are online. The requirements by you is just an Gmail ID and your customers need nothing but your website URL! This is really a amazing and innovative idea by Google.

Actually the problem is that the users who visit your site are usually lazy [no harms intended ;)]. They dont like logging in or creating an ID to just talk to you, etc etc..

So the conclusion is, THIS IS A GREAT TOOL! Try it..
Read more >>

Adding Favicons to Your Site!

Adding a favicon to the blogger(blogspot) blog:
For those who don't know what Favicon is 'Favicon is a small icon(image) displayed at the beginning of the address bar of the browser.It is also called Favourite Icon,Pageicon and urlicon. The main advantage of creating and using favicon is ,it makes it easy to find your blog or site when someone added your site to favourites or bookmarked your site/blog among several other sites.
favicon Most of the people use 16*16 pixel favicon(you can also use 32*32 pixel favicon) with ".ico" format.But,you can also use gif,png(image formats) as well.

So,ready to create a favicon?

Updated:
I found a free Favicon generator tool which will save lot of your time. Just go to this page and upload any image file (JPG or GIF or PNG or BTM) and it will automatically convert it to icon file and you can save it to your desktop. Next, you need to upload it to some host. There are lot of free hosts available to host .ico files and with hotlinking enabled.. Just do a quick google search. Once you upload it to some host. you get a direct url to the favicon file..
Ex:
http://howshealth.com/favicons/bt.ico


Here it is :


Now, go to your blogger Dashboard >> Design >> Edit HTML


and look for this code(it is at the top the template)

<title><data:blog.pagetitle/></title>

and add the below code just after the above one[as shown in the below screenshot]
<link href='ICON FILE URL' rel='shortcut icon'/>
<link href='ICON FILE URL' rel='icon'/>

and replace the 'ICON FILE URL' with the url of your icon file.(like http://howshealth.com/favicons/bt.ico)
That's it! Now you can see a beautiful favicon in your blog.
Fee free to add the comments.....and doubts(if any?)
Read more >>

Adding Meta tags to you site

Adding meta tags is something I came across as one of the difficult tasks for the beginners who have a craze for publishing their blogs or websites. This process if too quite simple and involves editing the HTML code on your page. Well. I will tell only about blogger here.

1. Navigate to Dashboard >> Design >> Edit HTML
2. Click on the 'Expand Widget Templates'
3. Then search for
<b:include data='blog' name='all-head-content'/>
4. Then add the meta tag after the above code as shown in the picture given below:

 
Read more >>

Removing The NavBar from your blogger page

NavBar is present as default in the Blogger pages. This helps in increasing the number of visits to your blog when other bloggers click the 'Next Blog' button present there. But many times, the user want to keep their blog neat. For this the first step that could be taken is to remove the NavBar. Earlier, blogger provided the option to disable the NavBar from the 'Layout' part. But now it isn't that easy. Don't consider that as tough either ;)

1. Login to your blogger account
2. From your Dashboard opt for Layout
3. Now choose Edit Html
4. You will see your template code there.
5. In that template code, find
 ]]></b:skin>
6. Replace the above code with
#navbar-iframe,#navbar { display: none !important; } ]]></b:skin>
Now save the template and see your blog. Congrats! You are done. Please leave your comments if you have any problems or it has helped you.
Read more >>

Adding back to top button on your Blogger blog

I am gonna tell you about back to top button and how to add them to your blog. It a small button [link] which gives the visitors a functionality to navigate easily through you blog/site. You can see that for an example on my other blog here. Its not really a big deal doing that. The steps are as follows:

1.   First open you dashboard and click "Design" and then navigate to "Edit HTML".
2.   Then find this code                   
]]></b:skin>
3. Then paste the following code before this code:
#backtotop {
padding:5px;
position:fixed;
bottom:10px;right:10px;
cursor:pointer;
}
 4. Now find
</body>

5. And before it paste the following code
<a href="#" id="backtotop"><img src="Image-Url" alt="back to top" /></a>  
6. Now replace the Image-Url with the image link of ur choice!

For example, I am providing you with one of the images which I liked.
https://blogger.googleusercontent.com/img/b/R29vZ2xl/AVvXsEiYEAyKudi-98uUNvaunCApLClszZc4D_jV2tktME5ZV7nnsfVjpQOxrB8Id03DmXtrgspf0CXvGhERlSR2_djhbHVKmdU3ApJ1YTLxZR5JtyCdXa6V5i1Gl8GtD2IoeoAErsYrl0oXotN-/s400/bttp-11.png

Read more >>